Linux
1
cat < peanuts.txt > banana.txt
The above command does input redirection ie input is redirected from standard input to peanuts.txt first (cat < peanuts.txt) is executed this redirects the input from standard input to the peanuts.txt Now our new input is peanuts.txt, thus whatever is in file peanuts.txt is redirected as output to banana.txt Thus after this command banana.txt will contain the copy of the content of peanuts.txt
1
ls /fake/directory > peanuts.txt
This shows the error in the console but the error is not copied in the file.Here another IO stream which is stderr is in play whose default mode is screen.
We have to use file descriptor to transfer output to file
1
2
ls /fake/directory 2> peanuts.txt
#this redirects our stderr to the file peanuts.txt
1
ls /fake/directory > peanuts.txt 2>&1
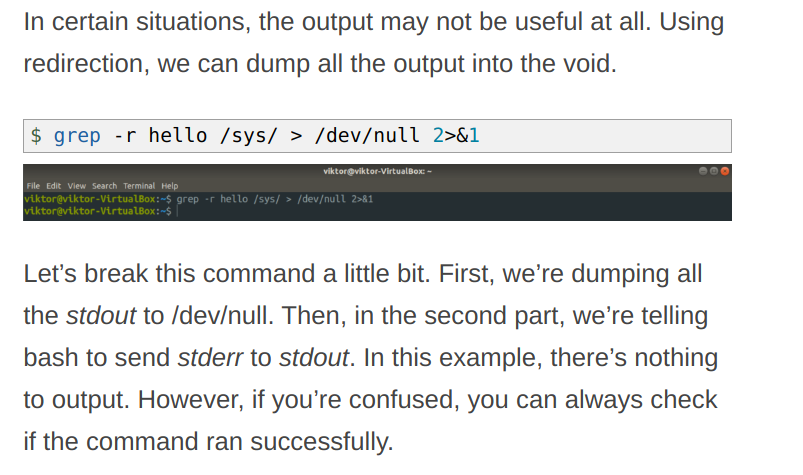
This sends the results of ls /fake/directory to the peanuts.txt file and then it redirects stderr to the stdout via 2>&1. The order of operations here matters, 2>&1 sends stderr to whatever stdout is pointing to. In this case stdout is pointing to a file, so 2>&1 also sends stderr to a file. So if you open up that peanuts.txt file you should see both stderr and stdout. In our case, the above command only outputs stderr.
1
2
ls /fake/directory &> peanuts.txt
#this is shorter way to redirect both stderr and stdout to the file
1
2
3
ls /fake/directory 2> /dev/null
#this will send all the stderr to the file /dev/null and thus we  won't see any
#error in terminal
Note: /dev/null is a special file that is used to write and is present in every file system. It is used for writing purpose and Whatever you write to /dev/null will be discarded, forgotten into the void.It’s known as the null device in a UNIX system.
Note why 2>&1 and not 2>1 ? Here is one way to remember this construct (although it is not entirely accurate): at first,
2>1may look like a good way to redirectstderrtostdout. However, it will actually be interpreted as “redirectstderrto a file named1”.&indicates that what follows and precedes is a file descriptor and not a filename. So the construct becomes:2>&1.
Here all of the output is shown in terminal
Here the stdout is dumped to null thus only error is shown
More details here
File Descriptor
A file descriptor is a non-negative number that is used to access a file or stream. We will go in depth about this later, but for now know that the file descriptor for stdin, stdout and stderr is 0, 1, and 2 respectively.
1
pipe and tee
1
ls -la /etc | less
| The pipe operator | , represented by a vertical bar, allows us to get the stdout of a command and make that the stdin to another process. In this case, we took the stdout of ls -la /etc and then piped it to the less command. |
tee command reads the standard input and writes it to both the standard output and one or more files. The command is named after the T-splitter used in plumbing. It basically breaks the output of a program so that it can be both displayed and saved in a file. It does both the tasks simultaneously, copies the result into the specified files or variables and also display the result.
1
ls | tee peanuts.txt
This will write the output of ls to file and also displays to console as well.
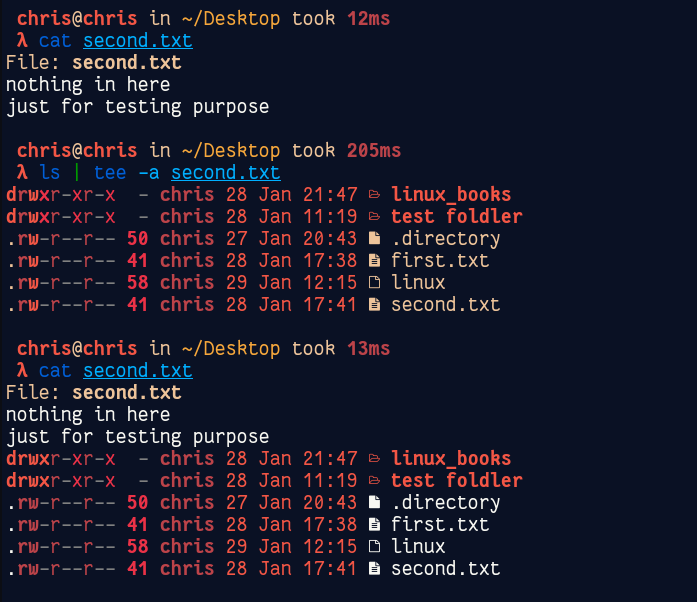
The tee command can also write to multiple files. To do so, specify a list of files separated by space as arguments:
1
command | tee file1.out file2.out file3.out
By default, the tee command will overwrite the specified file. Use the a (-append) option to append the output to the file :
1
command | tee -a file.out
To ignore interrupts use the i (-ignore-interrupts) option. This is useful when stopping the command during execution with CTRL+C and want tee to exit gracefully.
1
command | tee -i file.out
If you don’t want tee to write to the standard output, you can redirect it to /dev/null:
1
command | tee file.out >/dev/null
Using tee in Conjunction with sudo
Let’s say you want to write to a file that is owned by root as a sudo user. The following command will fail because the redirection of the output is not performed by sudo. The redirection is executed as the unprivileged user.
1
2
3
sudo echo "newline" > /etc/file.conf
Output:
bash: /etc/file.conf: Permission denied
Simply prepend [sudo](https://linuxize.com/post/sudo-command-in-linux/) before the tee command as shown below:
1
echo "newline" | sudo tee -a /etc/file.conf
tee will receive the output of the echo command , elevate to sudo permissions and write to the file.
Using tee in conjunction with sudo allows you to write to files owned by other users.
env(Environment)
contains environment variables
more info: here
Cut
It extracts portions of text from a file.
Paste
The paste command is similar to the cat command, it merges lines together in a file.
head
Let’s say we have a very long file, in fact we have many to choose from, go ahead and cat /var/log/syslog. You should see pages upon pages of text. What if I just wanted to see the first couple of lines in this text file? Well we can do that with the head command, by default the head command will show you the first 10 lines in a file.
1
2
3
4
5
6
7
8
9
10
head /var/log/syslog

head -n 15 /var/log/syslog
#-n stands for no of lines

head -n -15 var/log/syslog
#this will pring all the lines excluding first 15 lines

head -c 15 /var/log/syslog
#-c stands for no of bytes
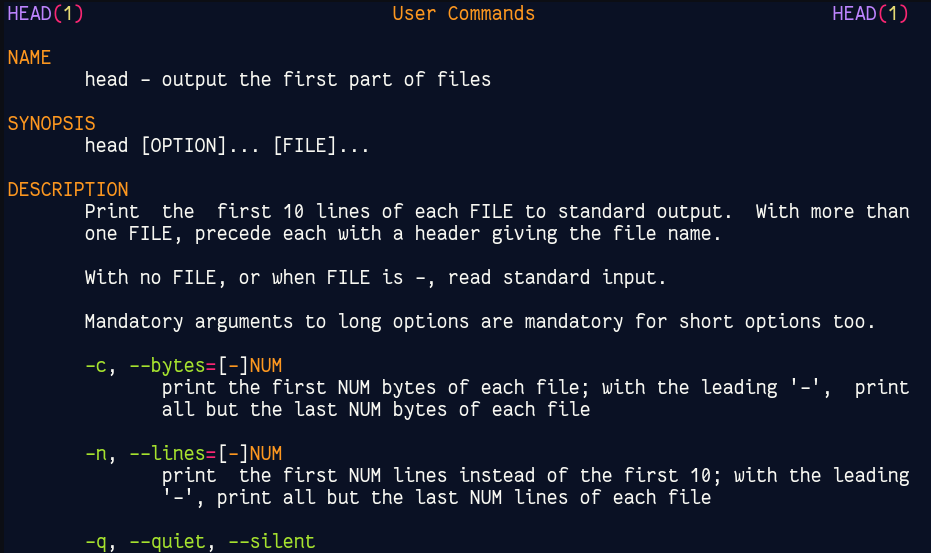
Now the description makes sense to me. Learn how it is written in manual page.
tail
similar to head that let’s us to view last 10 line by default
expand and unexpand
In our lesson on the cut command, we had our sample.txt file that contained a tab. Normally TABs would usually show a noticeable difference but some text files don’t show that well enough. Having TABs in a text file may not be the desired spacing you want. To change your TABs to spaces, use the expand command.
1
$ expand sample.txt
The command above will print output with each TAB converted into a group of spaces. To save this output in a file, use output redirection like below.
1
$ expand sample.txt > result.txt
Opposite to expand, we can convert back each group of spaces to a TAB with the unexpand command:
1
$ unexpand -a result.txt
join and split
The join command allows you to join multiple files together by a common field:
Let’s say I had two files that I wanted to join together:
1
2
3
4
5
6
7
8
9
10
11
12
13
14
15
16
17
18
19
20
21
22
23
file1.txt

1 John

2 Jane

3 Mary

file2.txt

1 Doe

2 Doe

3 Sue

$ join file1.txt file2.txt

1 John Doe

2 Jane Doe

3 Mary Sue
See how it joined together my files? They are joined together by the first field by default and the fields have to be identical, if they are not you can sort them, so in this case the files are joined via 1, 2, 3.
How would we join the following files?
1
2
3
4
5
6
7
8
9
10
11
12
13
14
15
file1.txt

John 1

Jane 2

Mary 3

file2.txt

1 Doe

2 Doe

3 Sue
To join this file you need to specify which fields you are joining, in this case we want field 2 on file1.txt and field 1 on file2.txt, so the command would look like this:
1
2
3
4
5
6
7
$join -1 2 -2 1 file1.txt file2.txt

1 John Doe

2 Jane Doe

3 Mary Sue
-1 refers to file1.txt and -2 refers to file2.txt. Pretty neat.
You can also split a file up into different files with the split command:
1
$ split somefile
This will split it into different files, by default it will split them once they reach a 1000 line limit. The files are named x** by default.
Sort
SORT command is used to sort a file, arranging the records in a particular order. By default, the sort command sorts file assuming the contents are ASCII.
- SORT command sorts the contents of a text file, line by line.
- sort is a standard command-line program that prints the lines of its input or concatenation of all files listed in its argument list in sorted order.
- The sort command is a command-line utility for sorting lines of text files. It supports sorting alphabetically, in reverse order, by number, by month, and can also remove duplicates.
- The sort command can also sort by items not at the beginning of the line, ignore case sensitivity, and return whether a file is sorted or not. Sorting is done based on one or more sort keys extracted from each line of input.
- By default, the entire input is taken as the sort key. Blank space is the default field separator.
The sort command follows these features as stated below:
- Lines starting with a number will appear before lines starting with a letter.
- Lines starting with a letter that appears earlier in the alphabet will appear before lines starting with a letter that appears later in the alphabet.
- Lines starting with a lowercase letter will appear before lines starting with the same letter in uppercase.
tr (Translate)
The tr (translate) command allows you to translate a set of characters into another set of characters. Let’s try an example of translating all lower case characters to uppercase characters.
1
2
3
4
5
$ tr a-z A-Z

hello

HELLO
As you can see we made the ranges of a-z into A-Z and all text we type that is lowercase gets uppercased.
1. A simple tr command use case is to change all lower case letters in text to upper case and vice versa, as shown below.
1
2
3
$ cat linux.txtlinux is my life
linux has changed my life
linux is best and everthing to me..:)
1
2
3
$ cat domains.txt | tr [:lower:] [:upper:]LINUX IS MY LIFE
LINUX HAS CHANGED MY LIFE
LINUX IS BEST AND EVERTHING TO ME..:)
2. Alternatively, you can use the following command to change all lower case letters to upper case in a file as shown.
1
2
3
$ cat linux.txt | tr [a-z] [A-Z]LINUX IS MY LIFE
LINUX HAS CHANGED MY LIFE
LINUX IS BEST AND EVERTHING TO ME..:)
3. To save the results written to stdout in a file for later processing, use the shell’s output redirection feature (>) as shown.
1
2
3
$ cat linux.txt | tr [a-z] [A-Z] >output.txt$ cat output.txtLINUX IS MY LIFE
LINUX HAS CHANGED MY LIFE
LINUX IS BEST AND EVERTHING TO ME..:)
4. In regards to the redirection, you can send input to tr using the input redirection and redirect the output to a file using the same command, as shown.
1
$ tr [a-z] [A-Z] < linux.txt >output.txt
5. Another useful feature is, you can use the -d flag to delete characters, for example to remove the spaces in the domain names using the following command.
1
2
3
$ cat domains.txtwww. tecmint. com
www. fossmint. com
www. linuxsay. com
1
2
3
$ cat domains.txt | tr -d ''www.tecmint.com
www.fossmint.com
www.linuxsay.com
6. If there are repeated characters in a sequence (for instance double spaces) in the text you are processing, you can use the -s option to squeeze the characters leaving only one occurrence of it.
1
2
3
$ cat domains.txtwww.tecmint.....com
www.fossmint.com
www.linuxsay.com
1
2
3
$ cat domains.txt | tr -s ''www.tecmint.com
www.fossmint.com
www.linuxsay.com
7. The -c option tells tr to use the complement in the given of SET. In this example, we want to delete all the letters and only leave the UID.
1
2
3
$ echo "My UID is $UID" | tr -cd "[:digit:]\n"
OR
$ echo "My UID is $UID" | tr -d "a-zA-Z"
8. Here is an example of breaking a single line of words (sentence) into multiple lines, where each word appears in a separate line.
1
2
3
4
$ echo "My UID is $UID"My UID is 1000$ echo "My UID is $UID" | tr " "  "\n"My
UID
is
1000
9. Related to the previous example, you can also translate multiple lines of words into a single sentence as shown.
1
2
3
4
$ cat uid.txtMy
UID
is
1000$ tr "\n" " " < uid.txtMy UID is 1000
10. It is also possible to translate just a single character, for instance a space into a “ : ” character, as follows.
1
2
$ echo "Tecmint.com =>Linux-HowTos,Guides,Tutorials" | tr " " ":"
Tecmint.com:=>Linux-HowTos,Guides,Tutorials
For more click here
uniq (Unique)
The uniq (unique) command is another useful tool for parsing text.
Let’s say you had a file with lots of duplicates:
1
2
3
4
5
6
7
8
9

reading.txt
book
book
paper
paper
article
article
magazine
And you wanted to remove the duplicates, well you can use the uniq command:
1
2
3
4
5
$ uniq reading.txt
book
paper
article
magazine
Let’s get the count of how many occurrences of a line:
1
2
3
4
5
$ uniq -c reading.txt
2 book
2 paper
2 article
1 magazine
Let’s just get unique values:
1
2
$ uniq -u reading.txt
magazine
Let’s just get duplicate values:
1
2
3
4
5
$ uniq -d reading.txt
book
paper
article
Note : uniq does not detect duplicate lines unless they are adjacent. For eg:
Let’s say you had a file with duplicates which are not adjacent:
1
2
3
4
5
6
7
8
9
10

reading.txt
book
paper
book
paper
article
magazine
article
1
2
3
4
5
6
7
8
9
$ uniq reading.txt
reading.txt
book
paper
book
paper
article
magazine
article
The result returned by uniq will contain all the entries unlike the very firstexample.
To overcome this limitation of uniq we can use sort in combination with uniq:
1
2
3
4
5
6
7

$ sort reading.txt | uniq

article
book
magazine
paper
wc and nl
The wc (word count) command shows the total count of words in a file.
1
2
$ wc /etc/passwd 96     265    5925 /etc/passwd
It display the number of lines, number of words and number of bytes, respectively.
To just see just the count of a certain field, use the -l, -w, or -c respectively.
1
2
3
$ wc -l /etc/passwd

96
Another command you can use to check the count of lines on a file is the nl (number lines) command.
1
2
3
4
5

file1.txt
i
like
turtles
1
2
3
4
5
6
$ nl file1.txt

1. i
2. like
3. turtles
grep
The grep command is quite possibly the most common text processing command you will use. It allows you to search files for characters that match a certain pattern. What if you wanted to know if a file existed in a certain directory or if you wanted to see if a string was found in a file? You certainly wouldn’t dig through every line of text, you would use grep!
Let’s use our sample.txt file as an example:
1
$ grep fox sample.txt
You should see that grep found fox in the sample.txt file.
You can also grep patterns that are case insensitive with the -i flag:
1
$ grep -i somepattern somefile
| To get even more flexible with grep you can combine it with other commands with | . |
1
$ env | grep -i User
As you can see grep is pretty versatile. You can even use regular expressions in your pattern:
1
$ ls /somedir | grep '.txt$'
Should return all files ending with .txt in somedir.
User Management
Each user has their own home directory where their user specific files get stored, this is usually located in /home/username, but can vary in different distributions.
The system uses user ids (UID) to manage users, usernames are the friendly way to associate users with identification, but the system identifies users by their UID. The system also uses groups to manage permissions, groups are just sets of users with permission set by that group, they are identified by the system with their group ID (GID).
One of the most important users is root or superuser, root is the most powerful user on the system, root can access any file and start and terminate any process. For that reason, it can be dangerous to operate as root all the time, you could potentially remove system critical files.
/etc/passwd
Remember that usernames aren’t really identifications for users. The system uses a user ID (UID) to identify a user. To find out what users are mapped to what ID, look at the /etc/passwd file.
1
$ cat /etc/passwd
This file shows you a list of users and detailed information about them. For example, the first line in this file most likely looks like this:
1
root:x:0:0:root:/root:/bin/bash
Each line displays user information for one user, most commonly you’ll see the root user as the first line. There are many fields separated by colons that tell you additional information about the user, let’s look at them all:
- Username
- User’s password - the password is not really stored in this file, it’s usually stored in the /etc/shadow file. We’ll discuss more in the next lesson about /etc/shadow, but for now, know that it contains encrypted user passwords. You can see many different symbols that are in this field, if you see an “x” that means the password is stored in the /etc/shadow file, a “*” means the user doesn’t have login access and if there is a blank field that means the user doesn’t have a password.
- The user ID - as you can see root has the UID of 0
- The group ID
- GECOS field - This is used to generally leave comments about the user or account such as their real name or phone number, it is comma delimited.
- User’s home directory
- User’s shell - you’ll probably see a lot of user’s defaulting to bash for their shell
Normally in a user’s setting page, you would expect you see just human users. However, you’ll notice /etc/passwd contains other users. Remember that users are really only on the system to run processes with different permissions. Sometimes we want to run processes with pre-determined permissions. For example, the daemon user is used for daemon processes.
Also should note that you can edit the /etc/passwd file by hand if you want to add users and modify information with the vipw tool, however things like these are best left to the tools we will discuss in a later lesson such as useradd and userdel.
/etc/shadow
The /etc/shadow file is used to store information about user authentication. It requires superuser read permissions.
1
$ sudo cat /etc/shadowroot:MyEPTEa$6Nonsense:15000:0:99999:7:::
You’ll notice that it looks very similar to the contents of /etc/passwd, however in the password field you’ll see an encrypted password. The fields are separated by colons as followed:
- Username
- Encrypted password
- Date of last password changed - expressed as the number of days since Jan 1, 1970. If there is a 0 that means the user should change their password the next time they login
- Minimum password age - Days that a user will have to wait before being able to change their password again
- Maximum password age - Maximum number of days before a user has to change their password
- Password warning period - Number of days before a password is going to expire
- Password inactivity period - Number of days after a password has expired to allow login with their password
- Account expiration date - date that user will not be able to login
- Reserved field for future use
In most distributions today, user authentication doesn’t rely on just the /etc/shadow file, there are other mechanisms in place such as PAM (Pluggable Authentication Modules) that replace authentication.
/etc/group
Another file that is used in user management is the /etc/group file. This file allows for different groups with different permissions.
1
$ cat /etc/grouproot:*:0:pete
Very similar to the /etc/password field, the /etc/group fields are as follows:
- Group name
- Group password - there isn’t a need to set a group password, using an elevated privilege like sudo is standard. A “*” will be put in place as the default value.
- Group ID (GID)
- List of users - you can manually specify users you want in a specific group
User Management Tools
Most enterprise environments are using management systems to manage users, accounts and passwords. However, on a single machine computer there are useful commands to run to manage users.
Adding Users
You can use the adduser or the useradd command. The adduser command contains more helpful features such as making a home directory and more. There are configuration files for adding new users that can be customized depending on what you want to allocate to a default user.
1
$ sudo useradd bob
You’ll see that the above command creates an entry in /etc/passwd for bob, sets up default groups and adds an entry to the /etc/shadow file.
Removing Users
To remove a user, you can use the userdel command.
1
$ sudo userdel bob
This basically does its best to undo the file changes by useradd.
Changing Passwords
1
$ passwd bob
This will allow you to change the password of yourself or another user (if you are root).
Permissions
File Permissions
As we learned previously, files have different permissions or file modes. Let’s look at an example:
1
2
3
4
$ ls -l Desktop/

drwxr-xr-x 2 pete penguins 4096 Dec 1 11:45 .
There are four parts to a file’s permissions. The first part is the filetype, which is denoted by the first character in the permissions, in our case since we are looking at a directory it shows d for the filetype. Most commonly you will see a - for a regular file.
The next three parts of the file mode are the actual permissions. The permissions are grouped into 3 bits each. The first 3 bits are user permissions, then group permissions and then other permissions. I’ve added the pipe to make it easier to differentiate.
1
d | rwx | r-x | r-x
Each character represent a different permission:
- r: readable
- w: writable
- x: executable (basically an executable program)
- : empty
So in the above example, we see that the user pete has read, write and execute permissions on the file. The group penguins has read and execute permissions. And finally, the other users (everyone else) has read and execute permissions.
Modifying Permissions
Changing permissions can easily be done with the chmod command.
First, pick which permission set you want to change, user, group or other. You can add or remove permissions with a + or -, let’s look at some examples.
Adding permission bit on a file
1
$ chmod u+x myfile
The above command reads like this: change permission on myfile by adding executable permission bit on the user set. So now the user has executable permission on this file!
Removing permission bit on a file
1
$ chmod u-x myfile
Adding multiple permission bits on a file
1
$ chmod ug+w
There is another way to change permissions using numerical format. This method allows you to change permissions all at once. Instead of using r, w, or x to represent permissions, you’ll use a numerical representation for a single permission set. So no need to specify the group with g or the user with u.
The numerical representations are seen below:
- 4: read permission
- 2: write permission
- 1: execute permission
Let’s look at an example:
1
$ chmod 755 myfile
Can you guess what permissions we are giving this file? Let’s break this down, so now 755 covers the permissions for all sets. The first number (7) represents user permissions, the second number (5) represents group permissions and the last 5 represents other permissions.
Wait a minute, 7 and 5 weren’t listed above, where are we getting these numbers? Remember we are combining all the permissions into one number now, so you’ll have to get some math involved.
7 = 4 + 2 + 1, so 7 is the user permissions and it has read, write and execute permissions
5 = 4 + 1, the group has read and execute permissions
5 = 4 +1, and all other users have read and execute permissions
One thing to note: it’s not a great idea to be changing permissions nilly willy, you could potentially expose a sensitive file for everyone to modify, however many times you legitimately want to change permissions, just take precaution when using the chmod command.
Ownership Permissions
In addition to modifying permissions on files, you can also modify the group and user ownership of the file as well.
Modify user ownership
1
$ sudo chown patty myfile
This command will set the owner of myfile to patty.
Modify group ownership
1
$ sudo chgrp whales myfile
This command will set the group of myfile to whales.
Modify both user and group ownership at the same timeIf you add a colon and groupname after the user you can set both the user and group at the same time.
1
$ sudo chown patty:whales myfile
Umask
Every file that gets created comes with a default set of permissions. If you ever wanted to change that default set of permissions, you can do so with the umask command. This command takes the 3 bit permission set we see in numerical permissions.
Instead of adding these permissions though, umask takes away these permissions.
1
$ umask 021
In the above example, we are stating that we want the default permissions of new files to allow users access to everything, but for groups we want to take away their write permission and for others we want to take away their executable permission. The default umask on most distributions is 022, meaning all user access, but no write access for group and other users.
When you run the umask command it will give that default set of permissions on any new file you make. However, if you want it to persist you’ll have to modify your startup file (.profile), but we’ll discuss that in a later lesson.
The above code basically represents what permissions are removed from file. The default permissions set by the system are 666 for files and 777 for directories.
When the above command is applied for folder it’s permission will be
1
2
666-021=645 #this would be new permission for directoires
777-021=756 #this would be new permission for files
After umask is set whenever new files and directories are created they will have 645 and 756 permissions by default.
Setuid
Setuid is a Linux file permission setting that allows a user to execute that file or program with the permission of the owner of that file.
There are many cases in which normal users need elevated access to do stuff. The system administrator can’t always be there to enter in a root password every time a user needed access to a protected file, so there are special file permission bits to allow this behavior. The Set User ID (SUID) allows a user to run a program as the owner of the program file rather than as themselves.
Let’s look at an example:
Let’s say I want to change my password, simple right? I just use the passwd command:
1
$ passwd
What is the password command doing? It’s modifying a couple of files, but most importantly it’s modifying the /etc/shadow file. Let’s look at that file for a second:
1
$ ls -l /etc/shadow-rw-r----- 1 root shadow 1134 Dec 1 11:45 /etc/shadow
Oh wait a minute here, this file is owned by root? How is it possible that we are able to modify a file owned by root?
Let’s look at another permission set, this time of the command we ran:
1
$ ls -l /usr/bin/passwd-rwsr-xr-x 1 root root 47032 Dec 1 11:45 /usr/bin/passwd
You’ll notice a new permission bit here s. This permission bit is the SUID, when a file has this permission set, it allows the users who launched the program to get the file owner’s permission as well as execution permission, in this case root. So essentially while a user is running the password command, they are running as root.
That’s why we are able to access a protected file like /etc/shadow when we run the passwd command. Now if you removed that bit, you would see that you will not be able to modify /etc/shadow and therefore change your password.
Modifying SUID
Just like regular permissions there are two ways to modify SUID permissions.
Symbolic way:
1
$ sudo chmod u+s myfile
Numerical way:
1
 sudo chmod 4755 myfile
As you can see the SUID is denoted by a 4 and pre-pended to the permission set. You may see the SUID denoted as a capital S this means that it still does the same thing, but it does not have execute permissions.
How setudi works
We’ve seen how things work without setuid/setgid, and in most cases that’s exactly how things should work. A user’s privileges should dictate what the commands they execute can and cannot do.
However, in some cases, you may need a user to run a program with more privileges — usually root privileges — than they have by default. The textbook case for this is the passwd command that allows users to change their own password. Changing your password inherently requires changing the /etc/shadow file. However, only the root user has write access to /etc/shadow
1
2
3
cooluser@LAPTOP-5V55HON5:~$ ls -l /etc/shadow
-rw-r—– 1 root shadow 1824 Oct 18 19:49 /etc/shadow
cooluser@LAPTOP-5V55HON5:~$
Under normal circumstances, that suggests we’d need to be root or have sudo privileges to change our password. However, normal users can execute the passwd command to change their own password without sudo or root permissions.
1
2
3
4
5
6
7
cooluser@LAPTOP-5V55HON5:~$ passwd
Changing password for cooluser.
Current password:
New password:
Retype new password:
passwd: password updated successfully
cooluser@LAPTOP-5V55HON5:~1$
To understand why passwd seemingly grants root-level access but ls doesn’t, let’s take a look at the permissions on those two executables.
1
2
3
4
5
cooluser@LAPTOP-5V55HON5:~$ ls -l /bin/ls
-rwxr-xr-x 1 root root 142144 Sep  5  2019 /bin/ls
cooluser@LAPTOP-5V55HON5:~$ ls -l /bin/passwd
-rwsr-xr-x 1 root root 68208 May 28 01:37 /bin/passwd
cooluser@LAPTOP-5V55HON5:~$
Both executables are owned by the root user and group, and there is only one difference in the permissions. As you can see, the passwd executable has an “s” where you’d expect an “x” for the file owner’s permissions. This “s” tells us the setuid bit is set.
Because the setuid bit is set, when we run the passwd command it is automatically executed as the owner of the file. Since root is the owner, the password change and required edit to /etc/shadow work.
The setgid bit is also an “s”, but in the execute position for the group that owns the file. For example, like what we see here on the wall executable in Ubuntu:
1
2
3
cooluser@LAPTOP-5V55HON5:~$ ls -l /usr/bin/wall
-rwxr-sr-x 1 root tty 35048 Apr  2  2020 /usr/bin/wall
cooluser@LAPTOP-5V55HON5:~$
Given those permissions, we know when we run the wall command, it will run with the privileges of the tty group.
Setgid
Similar to the set user ID permission bit, there is a set group ID (SGID) permission bit. This bit allows a program to run as if it was a member of that group.
Let’s look at one example:
1
2
3
$ ls -l /usr/bin/wall

-rwxr-sr-x 1 root tty 19024 Dec 14 11:45 /usr/bin/wall
We can see now that the permission bit is in the group permission set.
Modifying SGID
1
2
3
$ sudo chmod g+s myfile

$ sudo chmod 2555 myfile
The numerical representation for SGID is 2.
Process Permissions
Let’s segue into process permissions for a bit, remember how I told you that when you run the passwd command with the SUID permission bit enabled you will run the program as root? That is true, however does that mean since you are temporarily root you can modify other user’s passwords? Nope fortunately not!
This is because of the many UIDs that Linux implements. There are three UIDS associated with every process:
When you launch a process, it runs with the same permissions as the user or group that ran it, this is known as an effective user ID. This UID is used to grant access rights to a process. So naturally if Bob ran the touch command, the process would run as him and any files he created would be under his ownership.
There is another UID, called the real user ID this is the ID of the user that launched the process. These are used to track down who the user who launched the process is.
One last UID is the saved user ID, this allows a process to switch between the effective UID and real UID, vice versa. This is useful because we don’t want our process to run with elevated privileges all the time, it’s just good practice to use special privileges at specific times.
Now let’s piece these all together by looking at the passwd command once more.
When running the passwd command, your effective UID is your user ID, let’s say its 500 for now. Oh but wait, remember the passwd command has the SUID permission enabled. So when you run it, your effective UID is now 0 (0 is the UID of root). Now this program can access files as root.
Let’s say you get a little taste of power and you want to modify Sally’s password, Sally has a UID of 600. Well you’ll be out of luck, fortunately the process also has your real UID in this case 500. It knows that your UID is 500 and therefore you can’t modify the password of UID of 600. (This of course is always bypassed if you are a superuser on a machine and can control and change everything).
Since you ran passwd, it will start the process off using your real UID, and it will save the UID of the owner of the file (effective UID), so you can switch between the two. No need to modify all files with root access if it’s not required.
Most of the time the real UID and the effective UID are the same, but in such cases as the passwd command they will change.
For more details here
The Sticky Bit
One last special permission bit I want to talk about is the sticky bit.
This permission bit, “sticks a file/directory” this means that only the owner or the root user can delete or modify the file. This is very useful for shared directories. Take a look at the example below:
1
2
3
4
$ ls -ld /tmp

drwxrwxrwxt 6 root root 4096 Dec 15 11:45 /tmp
You’ll see a special permission bit at the end here t, this means everyone can add files, write files, modify files in the /tmp directory, but only root can delete the /tmp directory.
Modify sticky bit
1
$ sudo chmod +t mydir$ sudo chmod 1755 mydir
The numerical representation for the sticky bit is 1
#